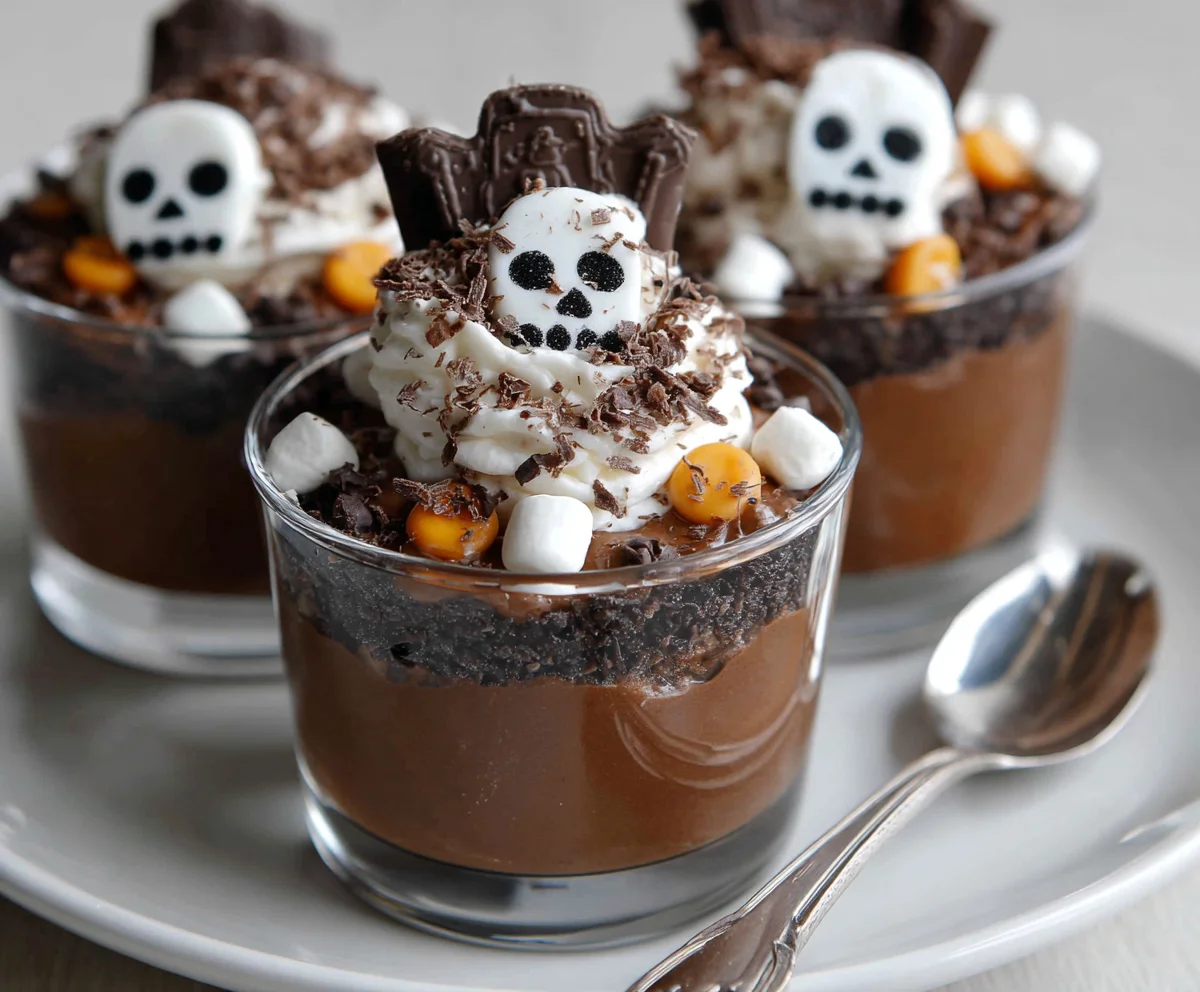
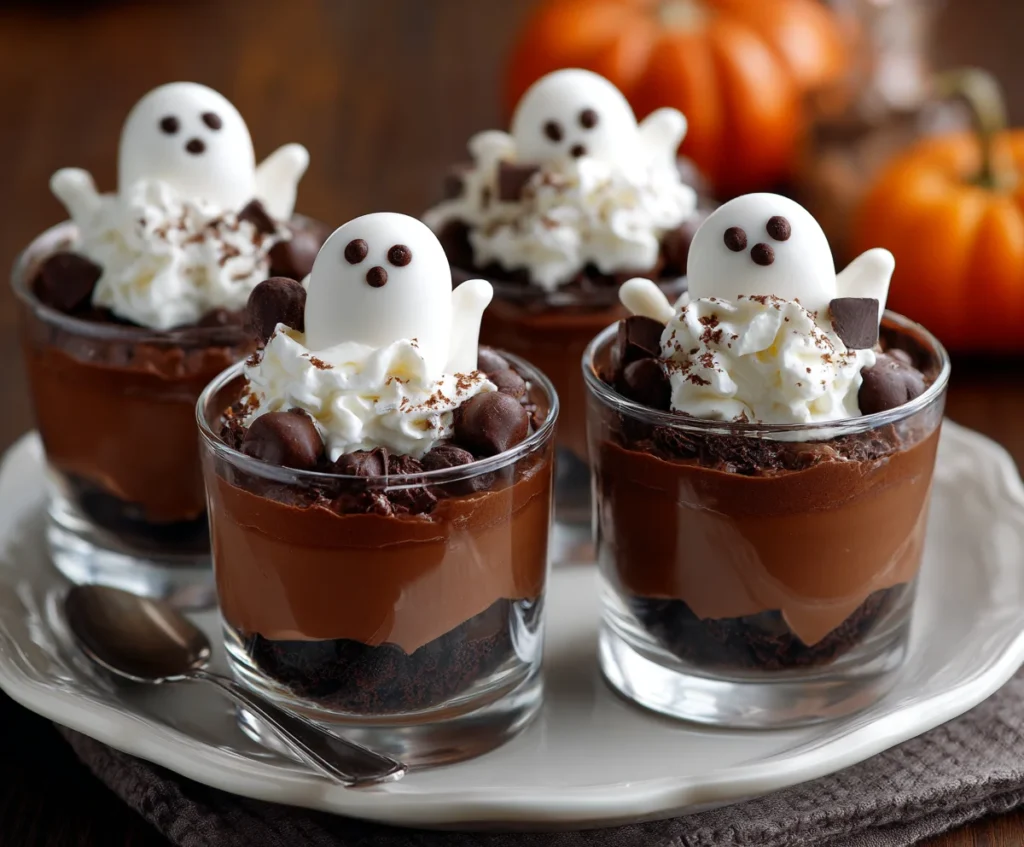
There’s something irresistibly fun and spooky about desserts that tell a story and these Homemade Chocolate Graveyard Pudding Cups do exactly that. Layers of rich chocolate pudding, crushed cookies, and edible tombstones come together in a dessert that’s as eerie as it is indulgent. Perfect for Halloween parties or a themed family night, this no-bake treat is a creative twist on classic pudding beautifully creepy, utterly delicious, and hauntingly simple to make.
Ingredients List
- 2 cups whole milk
- 1 packet (3.9 oz) instant chocolate pudding mix
- 1 cup heavy whipping cream
- 2 tablespoons powdered sugar
- 1 teaspoon vanilla extract
- 12 chocolate sandwich cookies (crushed finely for dirt)
- 6 small chocolate cookies or graham crackers (for tombstones)
- Black decorating gel or edible marker
- Gummy worms, candy pumpkins, or edible bones (for decoration)
- 6 small serving cups or clear glasses
Step-by-Step Instructions
Step 1: Prepare the Chocolate Pudding
In a mixing bowl, whisk the instant pudding mix with cold milk until thickened, about 2–3 minutes. Set aside in the refrigerator to chill and firm up.
Step 2: Whip the Cream
In another bowl, beat the heavy cream with powdered sugar and vanilla until soft peaks form. This adds a rich, creamy layer to balance the chocolatey depth.
Step 3: Combine and Layer
Fold half of the whipped cream into the pudding for a lighter texture. Spoon this mixture into each serving cup, filling about three-quarters full.
Step 4: Create the “Dirt” Layer
Sprinkle a generous layer of crushed chocolate cookies on top of each pudding cup—this is your “graveyard soil.” Press lightly to level the surface.
Step 5: Make the “Gravestones”
Write spooky names or RIP on small cookies or graham crackers using edible gel. Gently press one into each pudding cup to resemble a tombstone.
Step 6: Add Edible Decorations
Place gummy worms wriggling out of the soil, add candy bones, or scatter candy pumpkins to complete your graveyard scene.
Step 7: Chill and Serve
Refrigerate for at least 30 minutes before serving. This helps the layers set and the flavors meld beautifully.
Cook Time
Prep Time: 20 minutes
Chill Time: 30 minutes
Total Time: 50 minutes
Servings
Makes approximately 6 pudding cups.
Nutritional Information (approx. per serving)
- Calories: 290
- Protein: 4g
- Carbohydrates: 32g
- Fat: 16g
- Fiber: 1g
- Sugar: 22g
Storage Instructions
Keep refrigerated and covered with plastic wrap for up to 2 days. If making ahead, add cookie tombstones and candies just before serving to maintain their crisp texture.
Suggestions
- Add a layer of crushed brownies for a richer, fudgier base.
- For an adult twist, mix a splash of coffee liqueur into the pudding.
- Use white chocolate pudding and crushed golden cookies for a “ghostly graveyard” variation.
- Present in mini mason jars or glass cups for a clean, professional look.
Seasonal Relevance
These Chocolate Graveyard Pudding Cups are perfect for Halloween festivities, October birthdays, or any fall event that calls for a playful yet elegant dessert. Their dark chocolate richness fits right in with the cozy, indulgent spirit of the season.
Conclusion
Homemade Chocolate Graveyard Pudding Cups are more than a treat they’re an edible experience. Combining texture, creativity, and pure chocolate comfort, they capture the spirit of Halloween in every spoonful. Whether you’re entertaining guests or making them with kids, this dessert guarantees spooky smiles and second servings.
Homemade Chocolate Graveyard Pudding Cups Recipe
6
servings20
minutes290
kcalBring a little spooky fun to your Halloween table with these Chocolate Graveyard Pudding Cups. Layered with creamy chocolate pudding, fluffy whipped cream, and crunchy cookie dirt, each cup becomes a mini edible graveyard complete with tombstones and creepy candy worms. It’s a no-bake dessert that’s both hauntingly cute and devilishly delicious!
Ingredients
2 cups whole milk
1 packet (3.9 oz) instant chocolate pudding mix
1 cup heavy whipping cream
2 tablespoons powdered sugar
1 teaspoon vanilla extract
12 chocolate sandwich cookies, crushed (for “dirt”)
6 small chocolate cookies or graham crackers (for “tombstones”)
Black decorating gel or edible marker
Gummy worms, candy pumpkins, or candy bones (for decoration)
6 small serving cups or clear glasses
Directions
- Prepare the pudding: Whisk chocolate pudding mix with cold milk until thick. Refrigerate for 10 minutes to set.
- Whip the cream: Beat heavy cream with powdered sugar and vanilla until soft peaks form.
- Combine: Fold half the whipped cream into the pudding for a light, creamy texture.
- Layer: Spoon pudding mixture into each cup, filling about three-quarters full.
- Add “dirt”: Sprinkle crushed cookies evenly on top to form the soil layer.
- Make tombstones: Write “RIP” or names on small cookies with edible gel. Insert one into each cup.
- Decorate: Add gummy worms, candy bones, or pumpkins to bring your graveyard to life.
- Chill: Refrigerate for 30 minutes before serving.
Recipe Video
Notes
- For a dairy-free version, use plant-based milk and coconut whipped cream.
- Add crushed brownies for a richer base layer.
- Assemble cups up to a day ahead, but add decorations just before serving for best texture.
- Serve in glass cups for a professional, layered look.
FAQs
Q1: Can I use homemade chocolate pudding instead of instant mix?
Absolutely. Homemade pudding adds a luxurious depth. Just ensure it’s fully cooled before layering to prevent melting the whipped cream.
Q2: How can I make this recipe dairy-free?
Use almond or oat milk for the pudding, coconut whipped cream, and vegan chocolate cookies for the dirt layer. The result is just as indulgent.
Q3: Can I prepare these pudding cups the night before a party?
Yes, you can. Assemble the pudding and whipped cream layers in advance, but add cookie “dirt” and decorations right before serving to keep everything crisp and fresh.