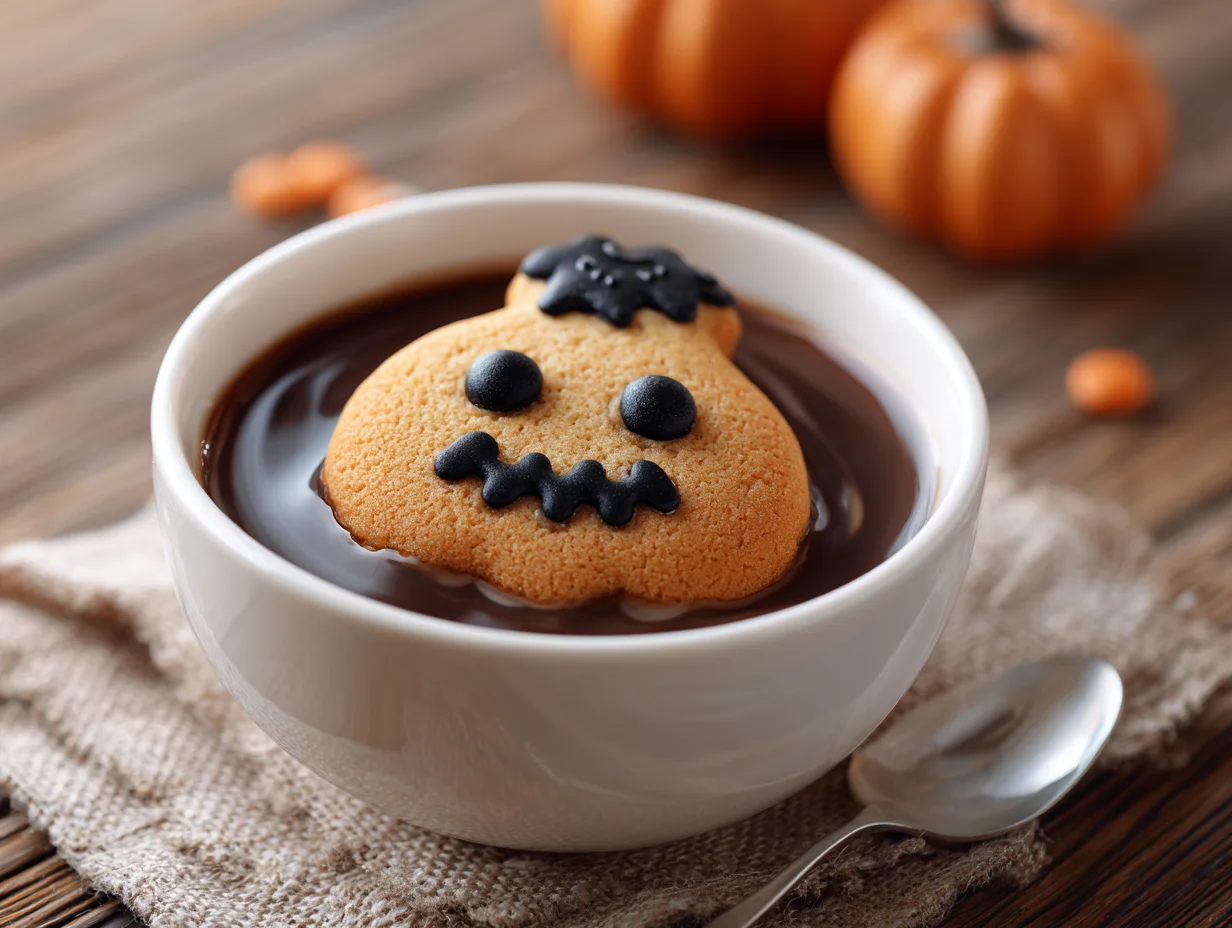
Halloween is the perfect time to bring a touch of fun, fright, and festivity into your baking. These Spooky Halloween Cookies are soft, chewy, and decorated with chilling charm to delight kids and adults alike. Whether you’re hosting a party or preparing treats for little trick-or-treaters, this recipe strikes the perfect balance of playful design and irresistible flavor. Get ready to create cookies that are as spooky to look at as they are delicious to eat.

Ingredients List
- 2 ½ cups all-purpose flour
- 1 tsp baking powder
- ½ tsp baking soda
- ½ tsp salt
- ¾ cup unsalted butter, softened
- 1 cup granulated sugar
- ½ cup light brown sugar, packed
- 2 large eggs
- 2 tsp pure vanilla extract
- Orange and black gel food coloring
- Candy eyes, sprinkles, or mini chocolate chips for decoration
- Royal icing (white, black, and orange)
Step-by-Step Instructions
Step 1: Prepare the Dough
In a medium bowl, whisk together flour, baking powder, baking soda, and salt. In a separate large bowl, cream the softened butter with granulated sugar and brown sugar until light and fluffy. Add eggs one at a time, followed by vanilla extract, mixing well after each addition.
Step 2: Add Color and Chill
Divide the dough into two or three portions. Tint one portion with orange gel food coloring and another with black. Leave one natural for a neutral contrast. Wrap each portion in plastic wrap and refrigerate for at least 1 hour to firm up.
Step 3: Roll and Cut
Preheat the oven to 350°F (175°C). Roll out each dough portion on a lightly floured surface to about ¼-inch thickness. Use Halloween-themed cookie cutters (pumpkins, bats, ghosts) to cut shapes. Transfer cookies to parchment-lined baking sheets.
Step 4: Bake to Perfection
Bake cookies for 8–10 minutes, or until edges are just set. Allow them to cool on the sheet for 2 minutes before transferring to a wire rack. Let them cool completely before decorating.
Step 5: Decorate Spookily
Using royal icing in white, black, and orange, outline and flood your cookies. Add candy eyes, sprinkles, or mini chocolate chips for details like scary faces or haunted eyes. Let icing set completely before serving.
Cook Time
Prep time: 20 minutes (plus chilling time)
Bake time: 10 minutes per batch
Total time: About 1 hour 40 minutes (including chilling)
Servings
Makes approximately 30 cookies
Nutritional Information (approx. per serving)
- Calories: 140
- Fat: 6g
- Carbohydrates: 20g
- Sugar: 12g
- Protein: 2g
- Fiber: 0.5g
Storage Instructions
Store decorated cookies in an airtight container at room temperature for up to 5 days. For longer storage, freeze undecorated cookies for up to 2 months, then thaw and decorate when ready to serve.
Suggestions
- For an extra spooky touch, use glow-in-the-dark edible glitter or black sanding sugar.
- Get kids involved in decorating—these cookies are as much a craft as they are a treat.
- Swap royal icing for melted white and dark chocolate if you prefer a richer topping.
Seasonal Relevance
These cookies are tailor-made for Halloween celebrations but can easily be adapted for other holidays with different shapes and colors. In October, they shine as the centerpiece of any dessert table, perfectly capturing the festive spirit of the season.
Conclusion
Spooky Halloween Cookies are more than just sweets; they’re edible art that brings families and friends together. With their vibrant colors, fun decorations, and delicious flavor, they’re guaranteed to impress at any Halloween gathering. Whip up a batch this season, and you’ll have treats that are as hauntingly good as they are memorable.

Spooky Halloween Cookies Recipe
30
servings20
minutes10
minutes140
kcalThese Spooky Halloween Cookies are soft, chewy, and decorated with festive icing and candy eyes to create the ultimate Halloween treat. Perfect for parties, trick-or-treaters, or a fun family baking activity, these cookies combine delicious flavor with spooky charm.
Ingredients
2 ½ cups all-purpose flour
1 tsp baking powder
½ tsp baking soda
½ tsp salt
¾ cup unsalted butter, softened
1 cup granulated sugar
½ cup light brown sugar, packed
2 large eggs
2 tsp pure vanilla extract
Orange and black gel food coloring
Candy eyes, sprinkles, or mini chocolate chips for decoration
Royal icing (white, black, and orange)
Directions
- In a medium bowl, whisk together flour, baking powder, baking soda, and salt.
- In a separate large bowl, cream butter with both sugars until fluffy. Add eggs one at a time, then mix in vanilla.
- Divide dough into portions, tint with orange and black food coloring, wrap, and refrigerate for at least 1 hour.
- Preheat oven to 350°F (175°C). Roll dough to ¼-inch thickness, cut into Halloween shapes, and place on parchment-lined baking sheets.
- Bake for 8–10 minutes until edges are just set. Cool completely on a wire rack.
- Decorate with royal icing, candy eyes, and sprinkles. Let icing set before serving.
Recipe Video
Notes
- Freeze undecorated cookies for up to 2 months and decorate when ready.
- For finer details, use piping bags with small tips and royal icing.
- Kids love helping with decorations,make it a family activity!
FAQs
Q1: Can I prepare the dough ahead of time?
Yes, you can make the dough up to 3 days in advance. Keep it tightly wrapped in the refrigerator until ready to roll and bake.
Q2: What type of icing works best for fine details?
Royal icing is ideal because it dries firm, allowing you to pipe clean lines and intricate designs that stay in place.
Q3: Can I make these cookies gluten-free?
Absolutely,substitute a high-quality 1:1 gluten-free baking flour for the all-purpose flour, and ensure all other ingredients (like sprinkles or decorations) are certified gluten-free.