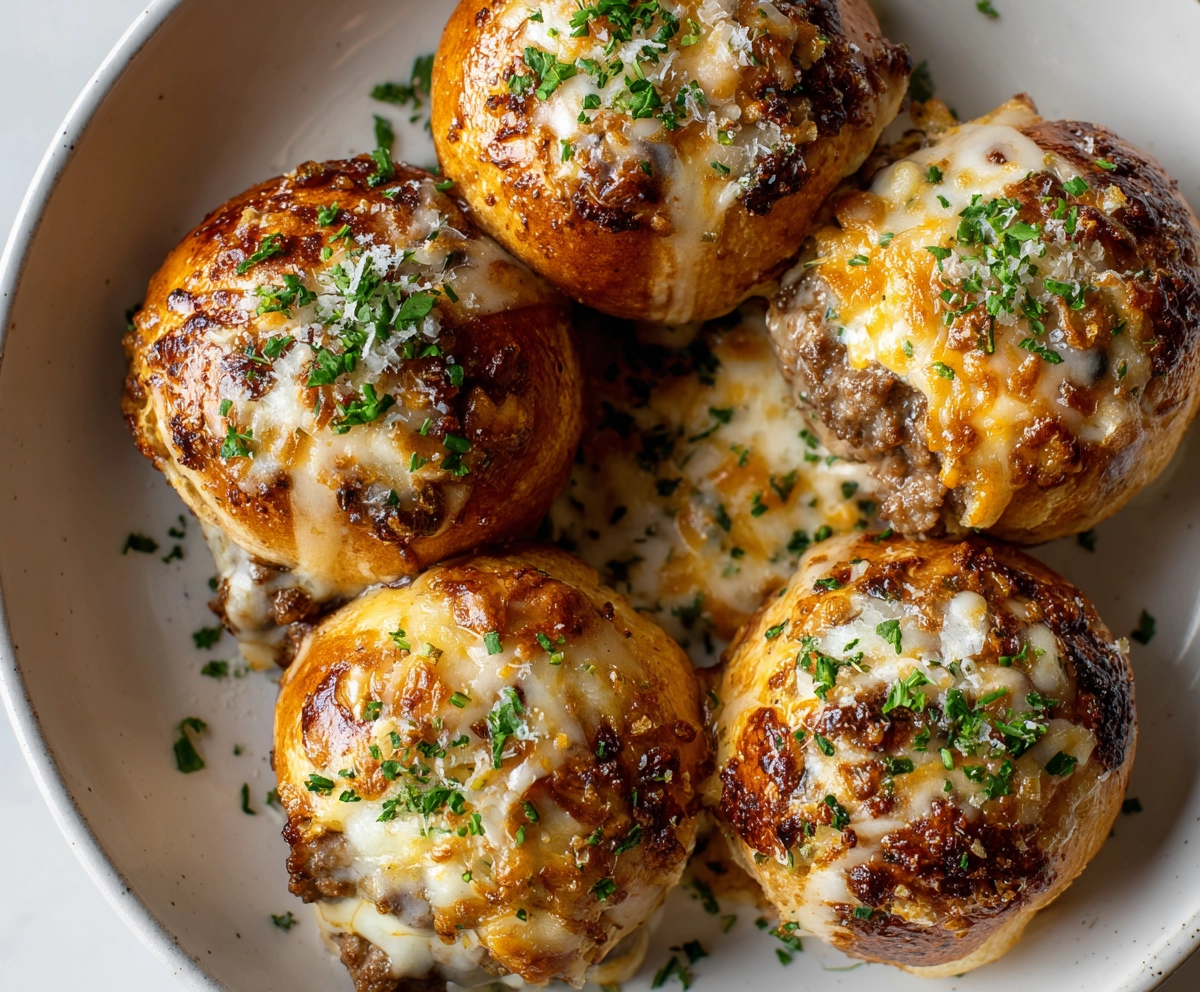
Transform the classic cheeseburger into a fun, bite-sized indulgence with Garlic Parmesan Cheeseburger Bombs. Juicy ground beef, melted cheddar, and savory seasonings are wrapped in golden, buttery dough and topped with a garlic-parmesan finish. Perfect for game days, parties, or an elevated weeknight treat, these bombs deliver maximum flavor in every bite.

Ingredients List
- 1 lb ground beef
- 1 small onion, finely chopped
- 2 cloves garlic, minced
- 1 teaspoon smoked paprika
- 1 teaspoon onion powder
- Salt and freshly ground black pepper, to taste
- 1 cup shredded cheddar cheese
- 1 can (16 oz) refrigerated crescent roll dough or biscuit dough
- 2 tablespoons unsalted butter, melted
- 2 tablespoons grated Parmesan cheese
- 1 teaspoon garlic powder
- Optional: pickles, ketchup, mustard, or cooked bacon for stuffing
Step-by-Step Instructions
1. Preheat the oven
Preheat oven to 375°F (190°C). Line a baking sheet with parchment paper or lightly grease it.
2. Cook the beef mixture
In a skillet over medium heat, cook ground beef with onion and garlic until browned. Drain excess fat. Season with smoked paprika, onion powder, salt, and pepper. Remove from heat and allow to cool slightly.
3. Assemble the cheeseburger bombs
Unroll crescent roll or biscuit dough and cut into squares large enough to hold a spoonful of beef mixture. Place a small amount of beef and a sprinkle of cheddar cheese in the center. Add optional toppings like pickles or bacon if desired. Fold dough over filling and pinch edges to seal.
4. Add garlic parmesan topping
Place stuffed dough balls on the prepared baking sheet. Brush with melted butter, then sprinkle with garlic powder and grated Parmesan cheese.
5. Bake until golden
Bake for 15–18 minutes, or until golden brown and puffed. Remove from oven and let cool slightly before serving.
6. Serve
Serve warm with ketchup, mustard, or your favorite dipping sauce.
Cook Time
15–18 minutes (plus 10 minutes prep)
Servings
8–10 bombs
Nutritional Information (approx. per serving)
- Calories: 320 kcal
- Protein: 18 g
- Fat: 20 g
- Carbohydrates: 18 g
- Fiber: 1 g
- Sugar: 1 g
Storage Instructions
Store leftovers in an airtight container in the refrigerator for up to 2 days. Reheat in the oven at 350°F (175°C) for 5–7 minutes to restore crispiness.
Suggestions
- Add a slice of jalapeño or a dash of hot sauce for a spicy kick.
- Swap cheddar for mozzarella or pepper jack for variation.
- Serve as an appetizer, snack, or fun dinner alongside a fresh salad.
Seasonal Relevance
These Garlic Parmesan Cheeseburger Bombs are perfect year-round, especially for casual gatherings, parties, or football season where finger foods and indulgent bites shine.
Conclusion
Juicy, cheesy, and bursting with savory garlic-parmesan flavor, these Cheeseburger Bombs are a crowd-pleasing recipe that turns a classic comfort food into an elevated bite-sized treat. Easy to prepare and endlessly customizable, they’re guaranteed to impress friends and family alike.

Garlic Parmesan Cheeseburger Bombs Recipe
8
servings10
minutes15
minutes320
kcalJuicy ground beef, melty cheddar, and aromatic garlic-parmesan flavors wrapped in golden dough make these Garlic Parmesan Cheeseburger Bombs an irresistible treat. Perfect for game days, parties, or a fun weeknight dinner, these bite-sized bombs combine comfort food with gourmet flair.
Ingredients
1 lb ground beef
1 small onion, finely chopped
2 cloves garlic, minced
1 teaspoon smoked paprika
1 teaspoon onion powder
Salt and freshly ground black pepper, to taste
1 cup shredded cheddar cheese
1 can (16 oz) refrigerated crescent roll dough or biscuit dough
2 tablespoons unsalted butter, melted
2 tablespoons grated Parmesan cheese
1 teaspoon garlic powder
Optional: pickles, ketchup, mustard, or cooked bacon for stuffing
Directions
- Preheat oven to 375°F (190°C). Line a baking sheet with parchment paper or lightly grease it.
- In a skillet over medium heat, cook ground beef with onion and garlic until browned. Drain excess fat. Season with smoked paprika, onion powder, salt, and pepper. Remove from heat and cool slightly.
- Unroll dough and cut into squares. Place a spoonful of beef mixture and a sprinkle of cheddar cheese in the center. Add optional toppings if desired. Fold dough over filling and pinch edges to seal.
- Place stuffed dough balls on the prepared baking sheet. Brush with melted butter and sprinkle with garlic powder and Parmesan cheese.
- Bake 15–18 minutes until golden brown and puffed. Remove and let cool slightly before serving.
- Serve warm with ketchup, mustard, or favorite dipping sauce.
Recipe Video
Notes
- Store leftovers in an airtight container in the refrigerator for up to 2 days.
- Reheat in the oven at 350°F (175°C) for 5–7 minutes to restore crispiness.
- Customize with jalapeños, different cheese types, or bacon for variation.
- Great as an appetizer, snack, or fun dinner alongside a fresh salad.
FAQs
Q1: Can I make these ahead of time?
A1: Yes, assemble the bombs and refrigerate until ready to bake. Add a few extra minutes to the baking time if chilled.
Q2: Can I freeze these cheeseburger bombs?
A2: Absolutely. Freeze assembled, unbaked bombs in a single layer. Thaw overnight in the fridge and bake as directed.
Q3: Can I use a different type of dough?
A3: Yes, puff pastry or homemade biscuit dough works well. Adjust baking time as needed for different dough thicknesses.